That constant hissing sound in your factory isn’t just annoying noise pollution—it is the sound of your profit margin vanishing into thin air.
Compressed air is one of the most expensive forms of energy in a manufacturing facility. According to industry data, a single leak as small as 1/16 inch can cost a facility over $1,000 per year in wasted electricity. Multiply that by dozens of fittings across a production line, and the financial impact becomes staggering.
When faced with a leak, the immediate reaction is often to blame the component: “This fitting is junk.”
However, in our experience supplying thousands of automation components, 90% of pneumatic leaks are not due to product failure, but installation error. Before you spend money replacing every connector in your system, check these 5 common culprits. You might be able to fix the problem in minutes for free.
⚠️ CRITICAL SAFETY WARNING: READ BEFORE YOU START
NEVER attempt to tighten, loosen, or remove a pneumatic fitting while the system is under pressure.
Compressed air stores a massive amount of potential energy. Loosening a fitting under pressure can turn a connector into a high-velocity projectile, causing severe injury or equipment damage.
Always follow this 3-step safety protocol:
- Turn off the air supply.
- Exhaust the downstream pressure (wait for the gauge to read 0 PSI).
- Only then touch the fittings.
Reason #1: The “Bad Cut” (Improper Tubing Preparation)
If you are using scissors, wire cutters, or a utility knife to cut your pneumatic tubing, stop immediately. You have likely found the source of your leak.
The Problem: Deformed Tubing
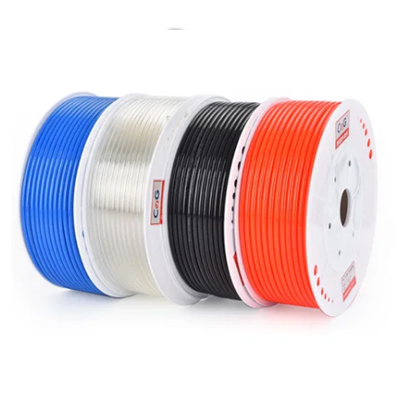
Standard cutting tools work by crushing the material to separate it. This flattens the soft PU (Polyurethane) or Nylon tubing, turning the end into an oval shape rather than a perfect circle.
Why does this matter? Inside every push-to-connect fitting is a precision-engineered Internal O-ring. This O-ring is designed to seal against a perfectly round surface. If you insert an oval-shaped tube, it creates tiny gaps on the sides—known as leak paths—where air can escape.
Furthermore, jagged or angled cuts can create sharp burrs. When you push the tube in, these burrs act like a knife, scratching or slicing the internal seal. Once that O-ring is damaged, the fitting is ruined and must be replaced.
The Fix: Cut it Square
- Use the Right Tool: Always use a dedicated Pneumatic Tube Cutter. These tools use a razor-sharp blade to slice through the tubing without crushing it.
- The 90-Degree Rule: Ensure the cut is perfectly perpendicular (90 degrees) to the tube length. An angled cut may not sit flush against the bottom of the fitting.
- Inspect: Before inserting, run your finger over the cut end. It should be smooth, round, and free of plastic flashing.
Reason #2: Worn O-Rings & Contamination
Sometimes, the installation is perfect, but the fitting still leaks. In this case, the culprit is often hiding inside. The Internal O-ring is the heart of a push-to-connect fitting, but it isn’t invincible.
The Problem: The “Scratch” Effect & Dirty Air
There are two main ways the internal seal fails:
- Tubing Scratches: Inside the fitting, metal Lock Claws (or gripping rings) bite into the tubing to hold it in place. If you frequently connect and disconnect the tubing, these claws leave deep longitudinal scratches on the tube’s surface.
- The Failure Mode: If you pull the tube out and re-insert it without trimming the end, those sharp scratches slide right over the rubber O-ring. This creates a channel for air to escape, or worse, the sharp plastic edges slice the rubber seal.
- Contamination (The Invisible Grit): If your compressed air supply isn’t filtered, microscopic dust, rust, or compressor oil travels through the lines. These particles can get lodged between the O-ring and the tubing, breaking the airtight seal.
The Fix: Trim or Filter
- The “One-Inch” Rule: Before re-connecting a used tube, check the end. If you see scratches or bite marks from the lock claws, use your Tube Cutter to trim off the damaged section (usually just 1 inch). Always insert a fresh, smooth section of tubing into the O-ring.
- The “New Tube” Test: If the fitting still leaks even with a brand new, perfectly cut piece of tubing, the internal O-ring is likely permanently damaged or dried out (“dry rot”). In this case, the fitting cannot be repaired—it must be replaced.
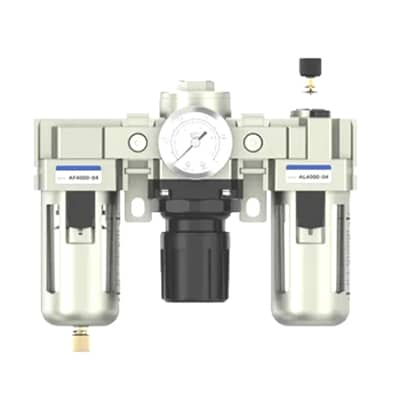
- Prevent it: If you find grit inside your fittings, your system needs better filtration. Consider installing an FRL Unit (Filter-Regulator-Lubricator) upstream to catch debris before it ruins your connectors.
Reason #3: Thread Sealing Mistakes (To Tape or Not to Tape?)
A common misconception is that “more Teflon tape equals a better seal.” In reality, improper use of thread sealant is a leading cause of system contamination and port damage.
The Problem: The “Mummy Wrap” & Wrong Threads
Not all threads are created equal, and treating them all the same guarantees a leak.
- BSPP / G-Thread (Parallel Threads): These fittings rely on a captive O-ring or washer at the base of the thread to create a seal.
- The Mistake: If you wrap Teflon tape around a BSPP fitting, the tape acts as a spacer. It prevents the fitting from screwing down all the way, leaving the O-ring “floating” above the sealing surface. Result: Massive leak.
- NPT (Tapered Threads): These require a sealant because the seal is created by the friction of the threads themselves.
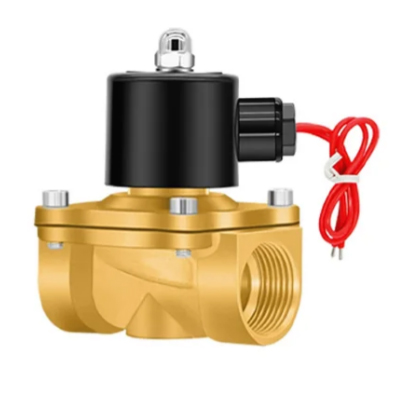
- The Mistake: Wrapping tape over the very first thread. When you screw it in, that piece of tape gets sliced off and pushed inside your air line. These “tape shreds” travel downstream and clog sensitive solenoid valves or cylinders.
The “Hulk” Effect (Overtightening)
With tapered NPT threads, the fitting acts like a wedge. If you overtighten it (thinking “tighter is better”), the wedge force becomes enormous. This frequently cracks the female port, especially if you are screwing brass fittings into an aluminum manifold. Once a port is cracked, the entire manifold must be scrapped.
The Fix: Know Your Thread
- For BSPP/G-Thread: Put the tape away. Inspect the rubber washer/O-ring. If it’s intact, screw it in until the washer compresses. No sealant needed.
- For NPT: Apply PTFE tape (2-3 wraps max) or liquid thread sealant. Crucial: Leave the first thread bare to prevent system contamination.
- The “Hand-Tight Plus” Rule: Tighten the fitting by hand, then use a wrench for 1.5 to 2 turns. Do not force it further.
Pro Tip: Tired of messy tape? Switch to our Pre-Coated Fittings. These come with factory-applied sealant on NPT threads, ensuring a perfect seal every time without the risk of tape shreds.
Reason #4: Side Loading (The “Bending” Stress)
Pneumatic tubing is flexible, but it is not a rope. One of the most common installation errors in tight spaces is forcing the tubing to make a sharp turn immediately after exiting the fitting.
The Problem: The Lever Effect
When you bend a tube too sharply right at the connection point, the tube acts like a lever. This creates “Side Load”—lateral force that presses the tube hard against one side of the fitting while pulling it away from the other side.
- The Result: This deformation distorts the Internal O-ring into an oval shape, creating a gap on the non-compressed side where air easily escapes. Over time, this stress can even crack the plastic release ring.
The Fix: Let the Fitting Do the Turn
- Respect the Bend Radius: Every type of tubing (PU, Nylon) has a minimum “Bend Radius.” Never force it tighter than spec.
- Change the Geometry: If you need a 90-degree turn, don’t bend the tube—use a 90° Elbow Fitting. If the connection point moves (like on a robotic arm), use a Rotary Joint or Swivel Fitting to absorb the movement so the tube stays straight entering the seal.
Reason #5: The Size Trap (Metric vs. Imperial)
“It fits, so it must be right.” In the world of precision pneumatics, this assumption causes headaches.
The Problem: The 0.35mm Gap
Visually, a 1/4″ tube and a 6mm tube look almost identical.
- 1/4 inch = 6.35mm.
- Difference = 0.35mm.
If you insert a 6mm tube into a 1/4″ fitting, it might feel like it locks in. However, that 0.35mm difference is a massive canyon for pressurized air (at 100 PSI) to escape through. Conversely, forcing a 1/4″ tube into a 6mm fitting will jam the lock claws and likely destroy the fitting upon removal.
The Fix: Verify, Don’t Guess
- Read the Print: Never rely on “eyeballing” the size. Always look for the Tube OD (Outer Diameter) markings printed directly on the tubing (e.g., “6mm x 4mm” or “1/4 OD”).
- Check the Fitting: Most fittings have the size stamped on the release ring or the body. Match the numbers exactly. Do not mix Metric and Imperial standards in the same circuit if possible.
How to Detect the Exact Leak Spot
You hear the hiss, but you can’t see the leak. Before you start tearing apart your machine, use these methods to pinpoint the failure.
Method 1: The Soapy Water Test (The Gold Standard)
This is the oldest, cheapest, and most effective trick in the book.
- The Mix: Mix a few drops of dish soap with water in a spray bottle. Alternatively, use a professional Leak Detection Spray (which bubbles longer and is non-corrosive).
- The Test: Spray it liberally over the fitting connections.
- The Result: Look for expanding foam or bubbles. A large bubble indicates a major leak; white foam indicates a slow, micro-leak.
Method 2: Ultrasonic Leak Detectors (For Pro Maintenance)
In a loud factory, you can’t hear a hiss over the roar of CNC machines.
- The Tech: An Ultrasonic Leak Detector listens for the high-frequency sound waves generated by escaping air—sounds inaudible to the human ear.
- The Benefit: You can pinpoint a leak from 20 feet away, even in a deafening environment.
Conclusion: Fix It or Trash It?
Now that you know why it leaks, the final question is: Can you save it?
Here is our simple “Salvage vs. Scrap” rule of thumb:
- FIX IT (Salvage):
- If the tubing cut is jagged -> Re-cut it.
- If the NPT thread leaks -> Re-apply sealant.
- If the tubing is scratched -> Trim 1 inch off the end.
- TRASH IT (Scrap):
- If the internal lock claws are broken.
- If the release ring is cracked from side loading.
- If a brand new, perfectly cut tube still leaks (internal O-ring failure).
Stop the Hiss, Save the Cash
Leaking air is leaking money. Don’t let a $2 fitting cause thousands in energy waste.
- Equip Your Team: Get the right tool for the job. Shop our Professional Pneumatic Tube Cutters.
- Upgrade Your System: Tired of cheap fittings failing? Switch to our industrial-grade Leak-Free Pneumatic Fittings Catalog.